
Set up SSH config on Mac and connect with host aliases
Set up ~/.ssh/config on macOS, use a host alias for SSH and SFTP, and verify the hostname, user, port and key with ssh -G.

Typing a user, host, port and key path every time you connect makes it easy to carry an old argument into the next command. An OpenSSH host alias records those choices in one place. This walkthrough builds a staging alias on macOS, checks the settings it resolves to, and shows how to reuse it from SSH and SFTP. Start with a test host whose address, login and expected server identity you already have.
Write down what the alias represents
Choose a name that communicates both role and environment. An alias such as shop-staging says more than an IP address or a nickname inherited from a former teammate. Make a short record of the actual hostname, the login account, the port and which key is approved for that account. Ask your host administrator for the expected host key fingerprint through an established channel before you connect. The client key identifies you to the server. The host key helps you identify the server.
Work on one connection at a time. Adding five aliases in one edit makes it harder to distinguish a spelling mistake from an incorrect default shared by several hosts. Keep the old connection command handy so you can compare the two paths. If you share a configuration example, replace real server names and usernames with placeholders. A configuration normally refers to a private key by path. It should never contain the private key itself.
From the first check to verification
- 01
Define
Record host, user, port and key.
- 02
Resolve
Read the effective config with ssh -G.
- 03
Connect
Confirm the server fingerprint.
- 04
Inspect
Check the account and remote path.
Conceptual workflow · follow each check before moving to the next step.
Create a narrow host block
Open the existing config in your editor, creating the file if needed. Back it up first if it already contains working profiles. The example below uses a fictional host and a staging key. The Host line matches the short name you type. HostName names the actual destination, User selects the remote account and Port overrides the default SSH port. IdentityFile points at the private key, typically the member of the pair without the .pub extension.
Indent the settings for readability and put host-specific blocks above broad defaults. OpenSSH generally uses the first value obtained for each option, so a matching wildcard near the top can take precedence over a more specific block below. Some settings, including identity files, can accumulate. Read the effective configuration before assuming that adding another line replaced an earlier value. Keep the config owned by your account and restrict write access. Also check the permissions of the key itself if the client refuses to load it.
| Item | What it tells you | Example or next step |
|---|---|---|
| Host | Alias typed at the command line | shop-staging |
| HostName | Actual endpoint | staging.example.com |
| User and Port | Remote account and SSH port | deploy, 2222 |
| IdentityFile | Path to the approved client key | ~/.ssh/id_ed25519_staging |
An alias points to one intended remote host.
Before connecting, check the resolved hostname and account against your staging record.
Define
Record host, user, port and key.
Resolve
Read the effective config with ssh -G.
Inspect the resolved configuration before dialing
Run ssh -G with the alias to print the evaluated options. Look for the hostname, user, port, identityfile and any proxy settings. This is a convenient way to diagnose the destination without opening a remote session. It also reveals settings supplied by other matching blocks or included files. Check that you typed the actual alias. A name that matches no specific block may still get wildcard settings and look plausible when printed.
Compare two outputs when a profile behaves unexpectedly. One output should be for the alias and the other for the explicit connection you intended to reproduce, using equivalent command-line arguments. Look first for differences in the remote account or identity path. If too many agent keys are offered, review IdentitiesOnly and the configured identity files against your team's key policy. Avoid adding broad overrides while investigating one machine, because a global change can affect every existing profile.

Keep client and server identities separate.
The key file identifies the client to the server. Check the server fingerprint against a trusted record.
Concept illustration, not an application screenshot.Connect and verify the remote identity
Use ssh followed by the alias, then check the host fingerprint using your trusted record when prompted. If the client reports a changed host key, confirm the cause with the server owner before altering any trust record. A rebuild can explain a changed key, but the warning alone cannot tell you whether the machine you reached is the intended one. Keep host verification part of the connection workflow even when aliases make connecting feel routine.
After authentication, check whoami, hostname and pwd inside the remote shell. The prompt may be customized and two environments may have identical directory names. Compare your observations to the staging record before running any command that changes files or service state. For a failed login, distinguish an unreachable endpoint from an authentication failure. A network timeout and an offered key rejected by the server point to different checks, even if both are experienced as an inability to connect.
The chart counts the items in a sample connection review. The endpoint group includes the hostname, port and account. Client identity and the expected host key each add one check. Keep the server fingerprint in a trusted record and compare it when connecting. It serves a different purpose from the IdentityFile path printed by ssh -G.
Settings in a sample connection review
Unit: settings. Synthetic example values, not production measurements.
Bars start at zero and share the same linear scale. Exact values are printed alongside each bar.
Reuse the alias for file inspection
Try sftp with the same alias if the account has access to the SFTP subsystem. Begin by listing a known path and checking the working directory. SSH shell access and SFTP access are separate capabilities on the server. A successful shell login does not guarantee that the file subsystem is available. Confirm the intended remote directory before transferring a file. Use a harmless test file in an approved staging folder if you want to verify that the upload policy behaves as expected.
If you also use All in Term, create a saved direct profile using the reviewed host, port, user and key details. The OpenSSH config in this guide applies to the command-line client. In All in Term, the saved connection and SFTP browser let you navigate the same host from a visual workspace. Keep environment labels consistent across the two tools so a staging task is recognizable whether it starts at your local prompt or in the application.
Keep the configuration easy to maintain
When a host is retired, check scripts and team notes for the alias before removing it. An alias can become an interface used by backups, tests or development tooling. Record changes to the destination alongside the reason and date so that a later connection failure has a clear starting point. If a new alias requires a proxy or shared policy, compare its resolved settings with the organization's documented example before rolling it out to everyone.
For the first trial, stop when you can show three things: the alias resolves to the intended endpoint, the remote identity matches your trusted information, and the authenticated account sees the expected path. Save that checklist near the connection details. If a future profile fails, repeat those checks in order. The setup is useful because it gives you one short name and a repeatable way to verify what that name means. Build the same habit for both staging and production, even when the underlying hosts change.

Give each environment a recognizable name.
Use the same environment labels in your terminal and saved connections so similar paths stay easy to distinguish.
Connect
Confirm the server fingerprint.
Inspect
Check the account and remote path.
Inside the application: a scoped local example
This capture uses the shipped UI component in an isolated renderer. The host, files and service data are demonstrations, not a production session. It illustrates the surrounding workflow; it does not verify every service-specific command in this guide.
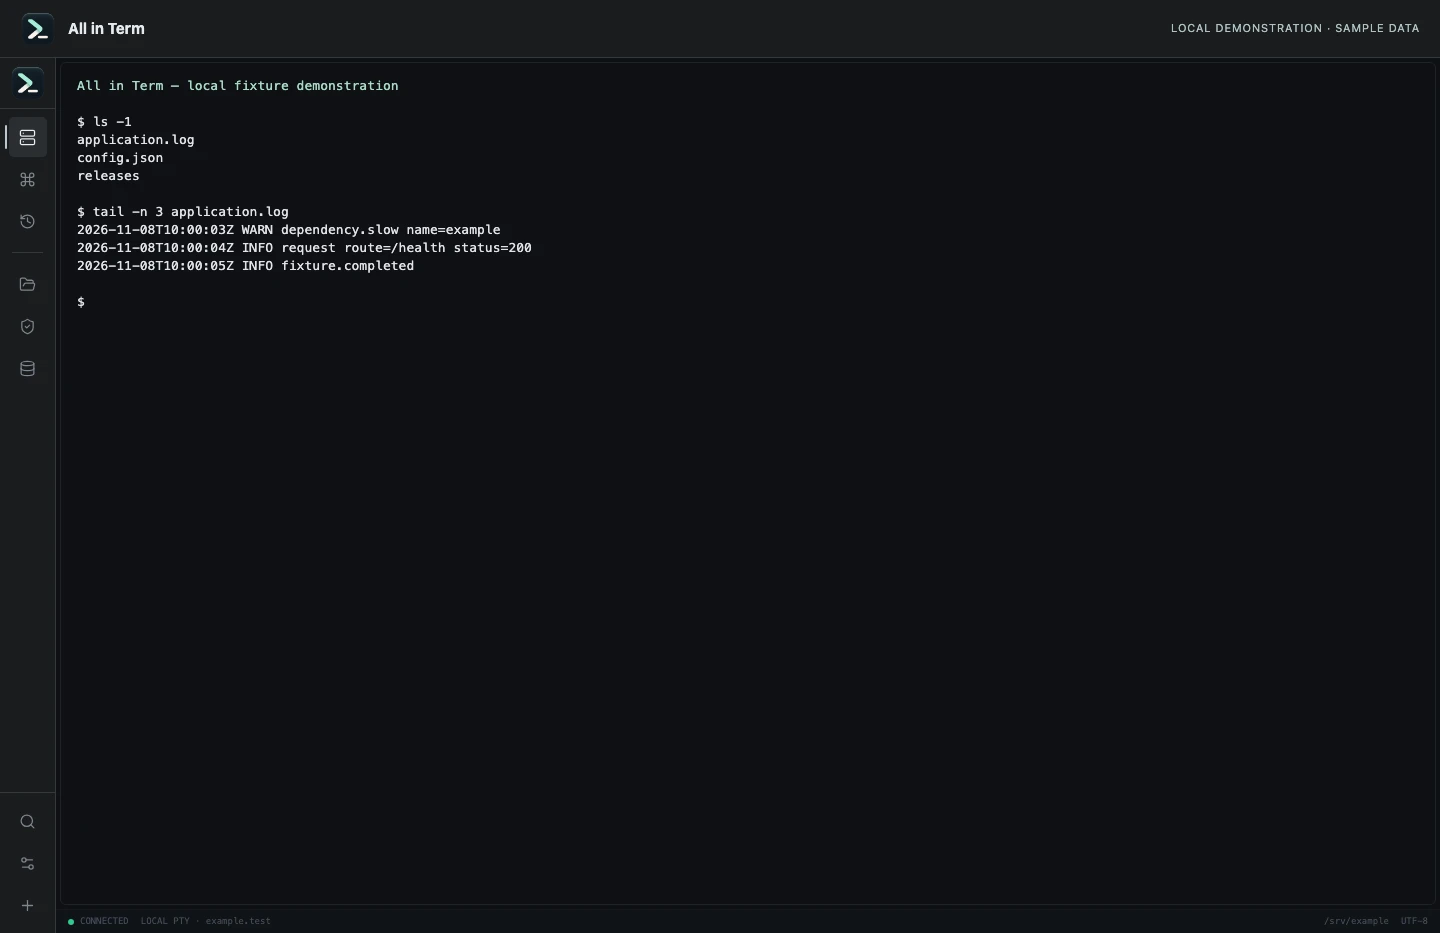
Local terminal view with command output recorded from an isolated temporary directory. Captured 2026-11-08. Open the image to inspect details.
List an isolated example directory
Executed /bin/ls against a newly created temporary directory.
Executed check
ls -1Recorded output
application.log
config.json
releases
Recorded 2026-11-08. Executed locally against synthetic fixtures. No production host or database was contacted. Read the recorded checks.
A small command example
Read the comments, confirm the active host and adapt any example names to your environment before running commands.
# Merge this block into ~/.ssh/config above broad defaults.
Host shop-staging
    HostName staging.example.com
    User deploy
    Port 2222
    IdentityFile ~/.ssh/id_ed25519_staging

# Run these in your local terminal, outside the config file.
ssh -G shop-staging | awk '/^(hostname|user|port|identityfile|proxyjump) /'
# Replace the example endpoint and key before connecting.
ssh shop-staging
sftp shop-staging
Further reading
Official documentation for the underlying tools. The workflows and synthetic examples above are editorial guidance, not performance claims.